
8. Urkund
Introduction
Urkund is an online plagiarism detection tool that compares submitted documents with over 11.5 million archived student papers, journals, periodicals and books and all over the web, to return an originality score (also referred to as the Urkund score). The Urkund score is the percentage of the document which is similar to other documents within the Urkund database. A low score indicates that there is little similarity and a score of 100 indicates that the entire submitted item has been copied from a single or multiple sources.
This chapter will cover:
As with other chapters in this guide, sections that are labelled as 'advanced' will extend your knowledge of the system but are not essential.
Policy and Urkund
It is University policy that, where possible, MMS should be used for submitting work to Urkund. There are a number of reasons for this, including but not limited to:
- MMS tracks lateness and understands the new university lateness policies
- MMS allows students to upload and delete submissions until the due date
- MMS produces a cryptographically signed receipt
When students submit to MMS the file is stored safely and securely on the university servers and MMS will submit a copy of the file to Urkund on behalf of the student.
In terms of the 'Urkund score' it is up to the discretion of the school in deciding where to set the guidelines on what is considered a ’high score’, as it is likely this will change depending on the module level and subject. For example, a score of 20 in a first-year module where all students in a module are reviewing the same source would be expected, but a score of 20 for a PHD thesis would indicate a significant problem.
Enabling Urkund
If a module has a configured coursework tool, enabling Urkund could not be easier. Click on the module title to get to the Module Overview. This page will list the name of the module, when it is running and other details. To enable Urkund just click the ”Enable Urkund” button as highlighted in Figure 1. For a quick recap on creating coursework tools and assignments see the box Recap: Setting up Coursework, or alternatively read sections 2. Creating and Accessing the Coursework Tool and 4. Creating Assignments in this guide
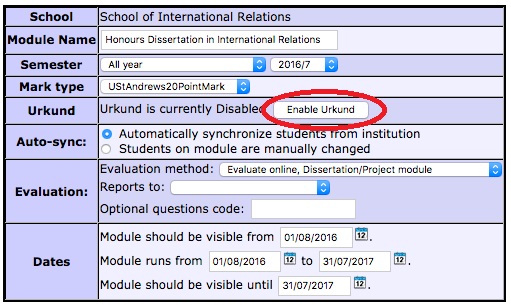
Figure 1: Example of the module table with the Enable Urkund button circled
Recap: Setting up Coursework
Step 1: Create Coursework Tool
Once Urkund has been enabled at the module or school level, staff can begin to create assignments. Assignments are created in the coursework tool so if a coursework tool does not already exist a new one can be created. To create a coursework tool scroll down the module overview page to the Tool section. From the list of Core Tools select Coursework by checking the tickbox to the left, and then clicking any of the 'Create Tools' buttons. A new Coursework tool will appear in the Tool table.
Step 2: Navigate to the Configure icon

To create an assignment, navigate to the coursework overview page by clicking the ’Coursework’ link on the Modules page or by clicking the ’Overview’ link on the module overview as in Figure 2. Assignments are created on the configuration pages which can be accessed by clicking the ’Configure’ icon in the top right of the coursework overview.
Step 3: Create an Assignment
To add an assignment click the ’Add Assignment’ button, this will create a new row in the assignment table. Fill in the assignment name and short name. Select a due date by clicking the calendar icon and selecting the required date or by entering the date using the format dd/mm/yyyy. The ’due time’ and ’feedback window’ should also be changed to represent the timings published in the module handbooks. The relative weight is used by MMS to calculate the overall coursework mark and can be given as a percentage of the overall coursework mark or as a percentage of the overall total mark.
To use Urkund students will need to submit assignments electronically. The ’style’ of the assignment should therefore be set to ’Single Upload’ to create an upload slot for each student. As Urkund only accepts certain file types you may wish to restrict the file types that students can upload by entering the file extensions in the ’Allowed types’ field, separated by a comma. Allowed file types are: doc, docx, pdf, txt, rtf, ppt, pptx, html, htm, odt, sxw and pages. The ’Grade Visibility’ drop down list controls the student visibility of the student grades and feedback. Students will never see the grades or feedback of other students. The visibility settings can be altered and saved any point during the running of the module.
Once the information for an assignment is completed click the ’Save Assignments’ button to save the details. A new assignment can be created by clicking the ’Add Assignment’ button again. For a more in depth discussion of creating assignments and the settings in the coursework tool, including extensions and automatic lateness policies please see the MMS Coursework Guide.
Timing of Submission to Urkund
MMS has three options as to when to submit a student upload to Urkund:
- Disabled - MMS will not submit to Urkund
- At the assignment due date – MMS will wait until the due date and then submit the file to Urkund (this is the default).
- At student submission – MMS will submit the student file to Urkund as soon as the file has finished uploading to MMS. Note: Students can delete and upload files until the due date so if the student submits a second file the Urkund score may be artificially high.
The timing of the submission to Urkund can be set on the ‘Configuration Settings’ page. You can navigate to this page in one of two ways:
- From the ‘Assignment Settings’ tab:
- Access the coursework tool
- Select the assignment from the coursework overview table
- Click on the ‘Assignment Settings’ tab at top left (see Figure 2)
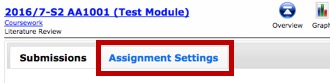
Figure 2: Assignment Settings tab on the Assignment Overview
- From the Configuration page
- Access the coursework tool
- Click the ‘Configure’ icon in the top right
- Locate the assignment in the configuration overview table
- Click the ‘Settings’ link in the ‘Detailed Settings’ column (see Figure 3).

Figure 3: Assignment Settings link on Coursework Configuration page
The Plagiarism Detection section can be found at the bottom of the Assignment Settings tab and will have a drop-down list from which the preferred Urkund timing can be selected. Click the ‘Update Assignment Settings’ button to save.
View Urkund Scores and Reports
Once students have submitted their assignments MMS will send a copy of the submission to Urkund. After a short period of time Urkund will return the Urkund score and report. Module staff will then be able to access the score and report on the overview page for that assignment. You can navigate to the assignment overview page from the coursework overview page: the main section of the coursework overview contains the Assignment table, which lists each assignment and the marks each student has received, click the title of the assignment in the assignment table. The assignment overview will list each student, the due date for each student, the feedback date for each student, any lateness, the student grades and the Urkund Score. To view the Urkund report click the Urkund Score (as highlighted in figure 4) which will open a new window containing the Urkund Report.
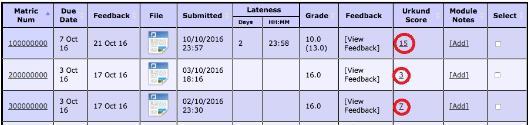
Figure 4: Example off the Assignment Overview table with link to the Urkund report circled
For information on how to interpret the Urkund Report see the CAPOD Plagiarism pages.
Previous: 7. Student Submissions or Next: 9. Entering Marks and Feedback