This quick guide shows you how to use the AV equipment in teaching spaces. It covers how to connect your laptop, display content, and adjust the volume and camera controls.
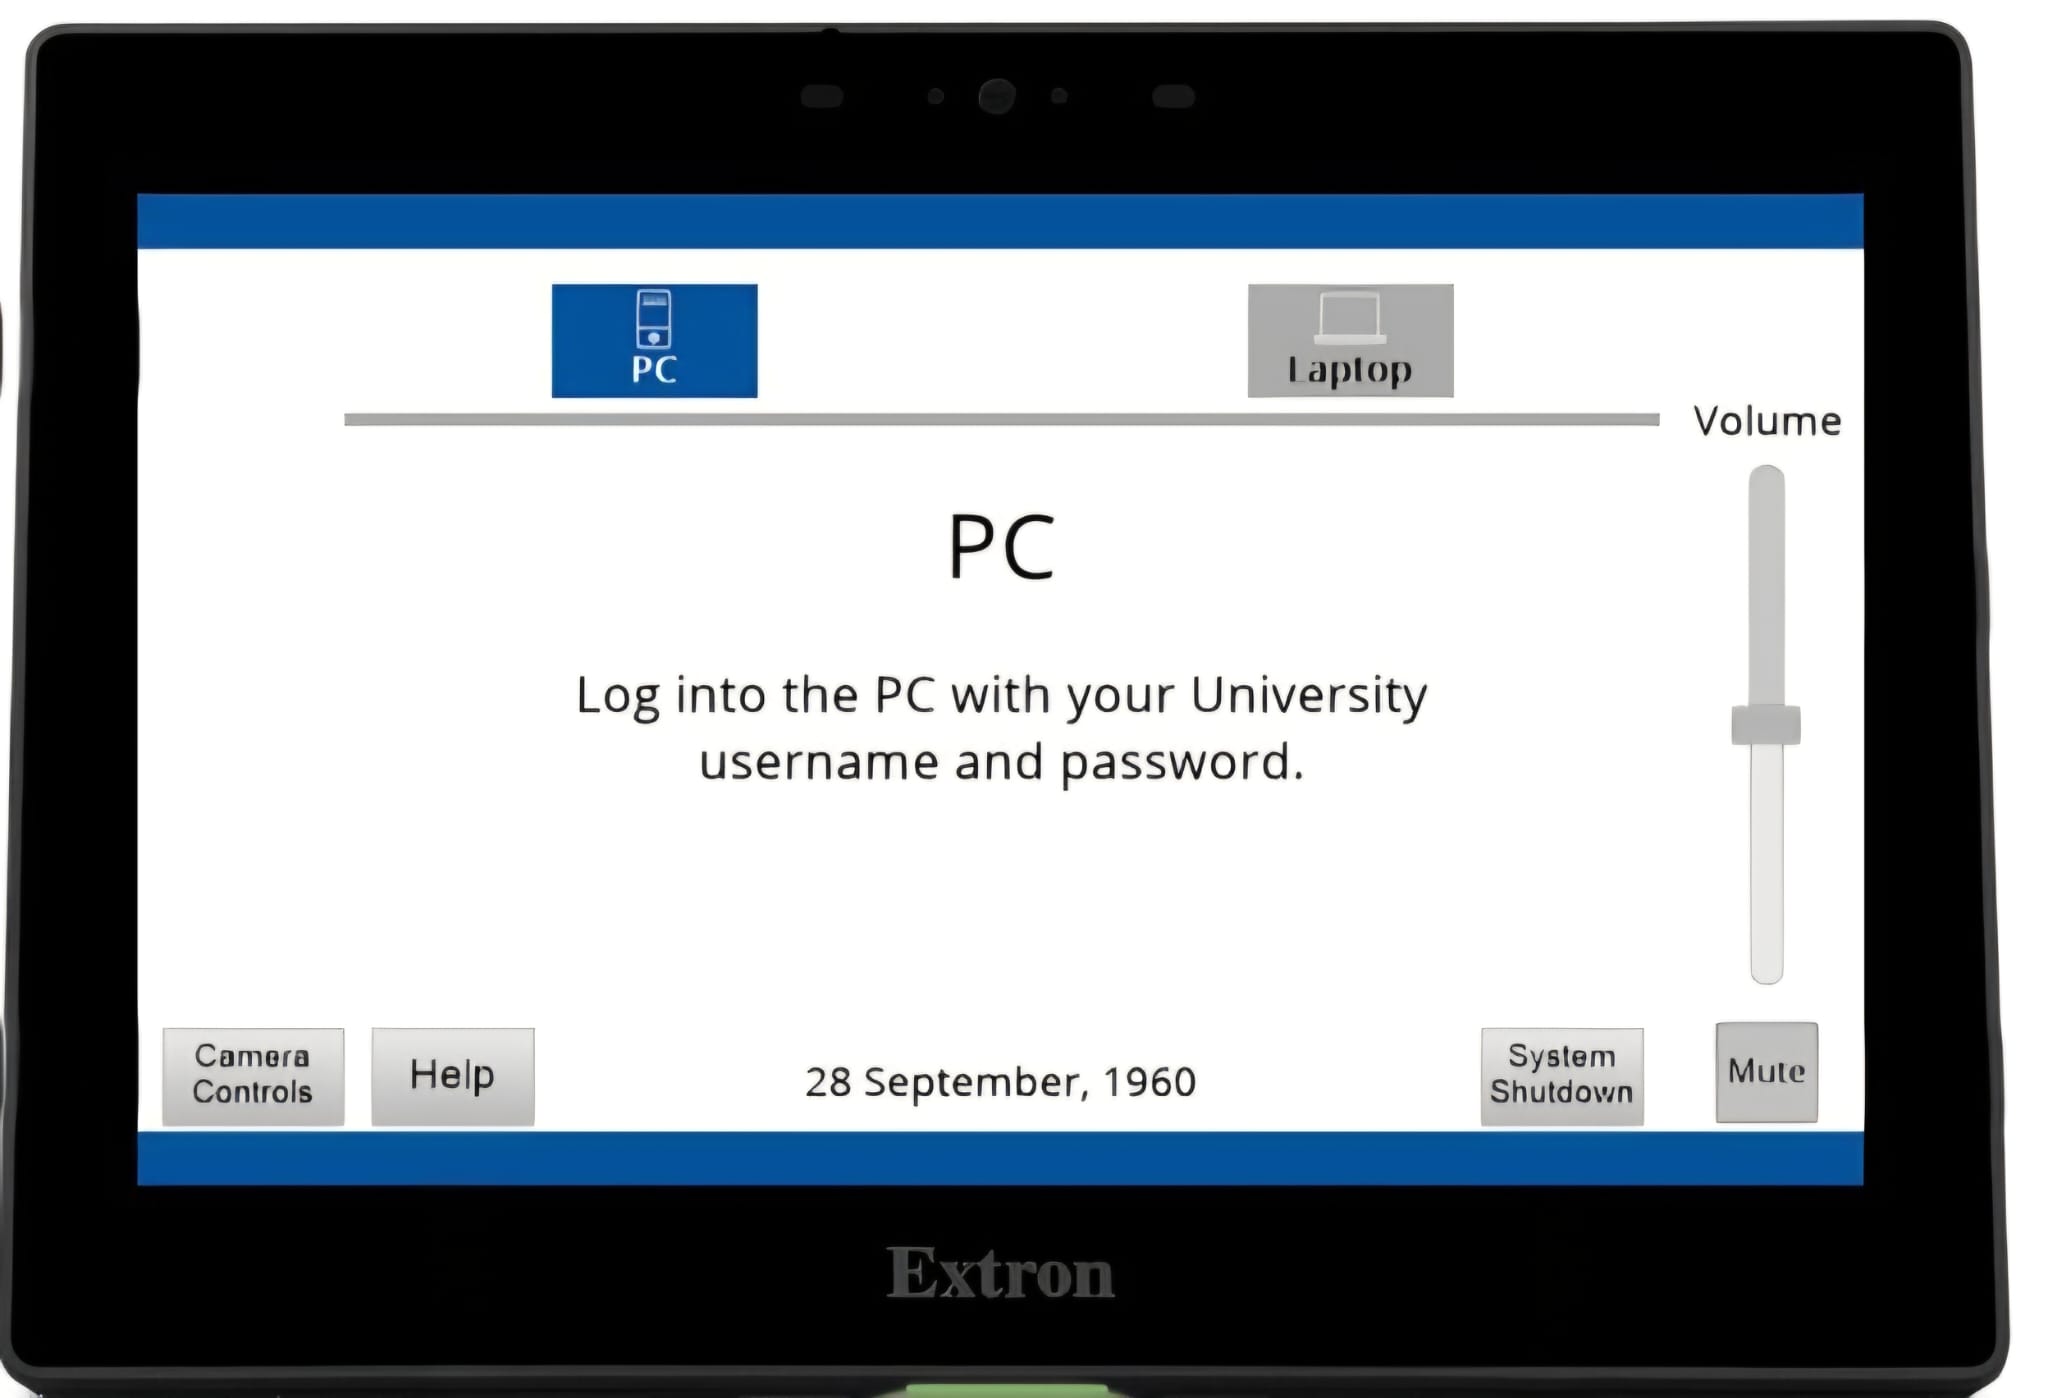
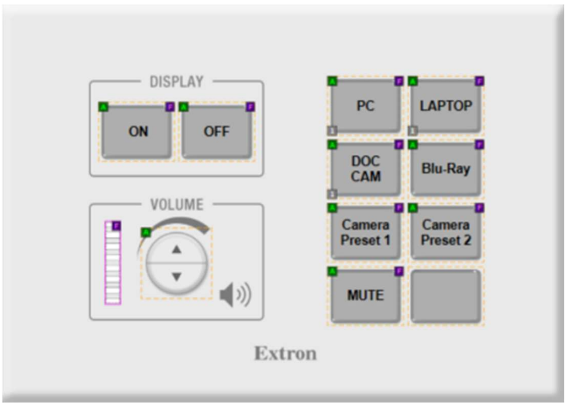
To begin, tap anywhere on the control panel, then choose what you want to display — for example, your laptop.
Connect your own laptop using the cable provided.
If you want to use your laptop with Panopto or Teams, also connect the clear silver USB cable.
Use the volume controls to adjust or mute audio.
To display physical documents, select Doc Cam on the control panel.
Open the document camera, place your document down, and use zoom, freeze, or focus so your class can follow along on the big screen while you write.
If your teaching space has a Blu‑ray player, you can display it by selecting Blu‑ray on the control panel.
To display the teaching PC, select PC.
Sign in by pressing Ctrl + Alt + Delete and entering your password.
To record the lecture using Panopto:
• Open Panopto from the desktop
• Sign in
• Select a room camera from the video drop‑down
• Adjust the camera controls on the panel
To check that the extended screen is shown on the projector, hold Windows + P.
Select Extend to use presenter notes or Duplicate to mirror your screen.
You can adjust the camera view using pan, tilt, zoom, or select presets for common teaching positions.
To use the microphones, undock and switch them on so the light turns green.
Adjust microphone audio using the control panel.
For IT assistance during your class, tap Help and contact AV Support on extension 3674.
When you’re finished, tap System Shutdown and confirm to turn off the system.
If you have an upcoming lecture and would like to book training or request support with setup, please contact the IT Service Desk.