University WordPress theme
The University WordPress theme has been network activated across all of our WordPress sites, so you can start using it now. But before you do, please first read through the documentation to gain an understanding of the features specific to this theme.
See an example of a WordPress site using the University theme.
The theme is fully responsive and compliant with the current WCAG accessibility guidelines.
Before using the University theme, you should understand how to use the following WordPress features:
More training topics are available on the WordPress support pages. If you'd like advice or support using either the University WordPress installation or the theme, please email itservicedesk@st-andrews.ac.uk.
Activate the theme
To activate the theme on your WordPress site, go to 'Appearance' then 'Themes' in the admin menu and activate 'University WordPress theme'.
Alternatively, you can email itservicedesk@st-andrews.ac.uk and someone will activate it for you.
-
Defining a home and posts page
First create a page to be your homepage if none exists already. If your website is blog focussed, you may want to use the 'Featured blog posts' template to be your homepage, but this is optional (see the page templates section).
You will also need to create a page specifically for showing all of your posts (see an example of a posts page). Create a new page with no content and WordPress will show all of your posts when set as your 'Posts page'
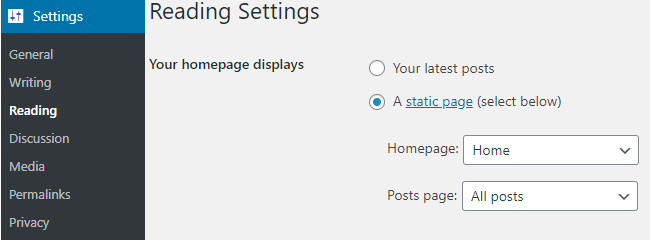
To set the homepage and posts page, go to the WordPress admin menu and navigate to: 'Settings' then 'Reading'.
Here you can define which of your pages will act as the homepage and posts page. If 'Your latest posts' is selected, your homepage will show all of your posts.
Footer and contact details
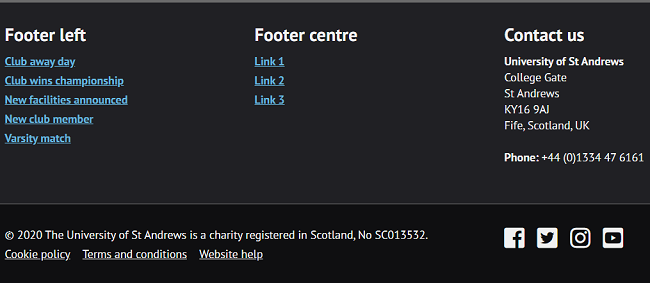
There are two variations of the footer you can choose from:
Large
Small
To change between the two, in the WordPress admin menu navigate to 'Appearance', 'Customise' then 'Footer settings'.
To change the links for the social media icons and the contact details to that of your own, navigate to 'Appearance' then 'Theme Options'.
You will learn how to update the blue list of links seen in the Large footer in the Menus and Widgets sections.
-
The page template is the styling, layout and functionality applied to a particular page, so it's important you understand how to use them.
When editing a page, you can select which page template is active from the 'Page Attributes' section.
For more information on page attributes settings, see: WordPress's page attributes support.
There are four page templates available for you to choose from:

Default template
This template acts like a standard static content page, with room to the right-hand side for a number of customisable widgets.
This should be the most commonly used template on your site.
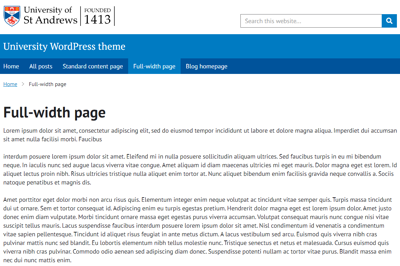
Full-width page
This template works just like the default template above, but with the widget space to the right removed.
This should be used sparingly, as a large wall of text can easily put off users.
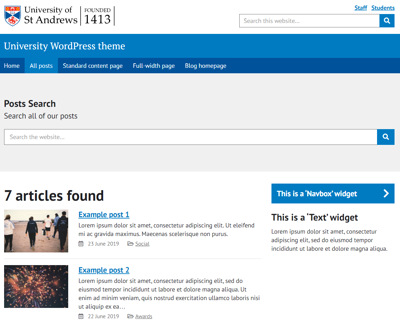
All posts
This template displays a full-width search bar and a list of all of your posts, paginated into 10 posts on each page.
Information on recommended post image sizes and more can be found in the Blog posts section.
There is also room for a right-hand side widget area.
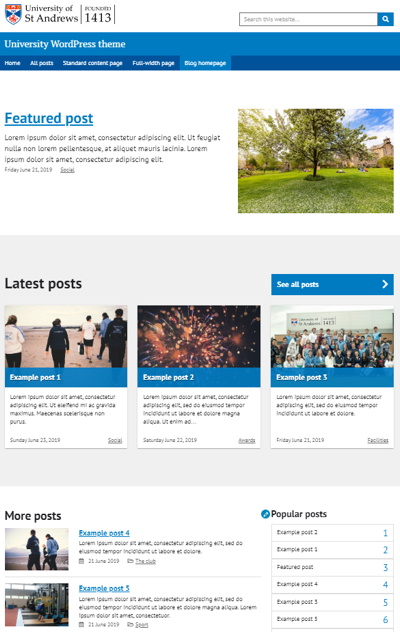
Featured blog posts
(example featured blog posts page)
This template works more like a standard blogging website homepage, with an optional featured post at the top, a list of latest posts in a 'tile grid' format and then a smaller continued list of your latest posts. This template also has the option to have a right-hand side widget area.
If you choose to use this template, you should only use it on your homepage. Users may be confused if you have multiple homepage-style pages on your site.
When using this page template, you must set the 'Posts page' in 'Settings' then 'Reading'. Otherwise, the 'See all posts' button will not work.
Information on recommended post image sizes and more can be found in the blog posts section.
-
You have two 'Banner' options for use on your homepage (see Site settings if you still need to setup a homepage).
To create a banner, navigate to 'Appearance -> Customise -> Hero banner'.
For information on image resolutions and resizing, please see our Image resizing tutorials.
Header image

This option display a single, large high-quality image.
The recommended image resolution is 1920 x 300 pixels, though if you upload a larger image WordPress will give you the option to crop it.
Hero banner
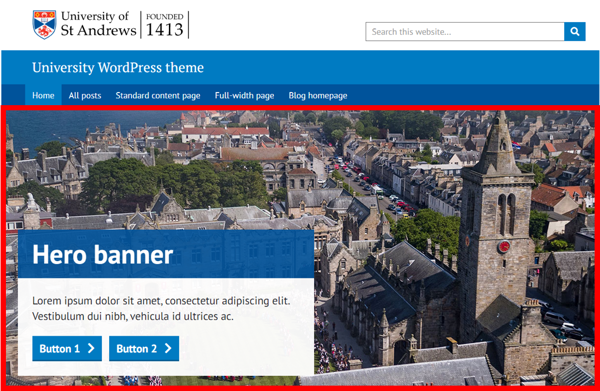
This option displays a large high-quality image along with a header, text and button links.
The recommended image resolution is 1920 x 600 pixels, though if you upload a larger image, WordPress will give you the option to crop it.
Various optional inputs allow you to change the header text, colours, descriptor text and buttons.
To create a button, first enter the location URL into the 'Call to action button 1' field, a new field 'Link text 1' will appear where you can enter the text that will be displayed on your button.
To create a second button follow the same steps as above.
-
Featured images
A featured image is displayed alongside a post on any search page or on the 'Featured blog posts' template.
Though this is optional, it is definitely recommended. If needed, you can download some generic St Andrews-themed images from the University's photo gallery.
Images must be at least 750 x 500 pixels in resotion. If the image is larger, it should maintain a similar aspect ratio.
You can upload your featured image in the 'Featured image' section on the right hand side of the post editor.
Introduction text
WordPress will automatically display the first 220 characters of your blog post as introduction text, which appears on any search page or on the 'Featured blog posts' template.

If you use the ‘Insert Read More tag’, you can set where the introduction text stops (though this still can't be more than 220 characters).
For more information, see WordPress's More Tag support page.
Categories
Categories allow for similar posts to be grouped together, for example, 'News', 'Tutorials', 'Review'. They will always appear below the introduction text.

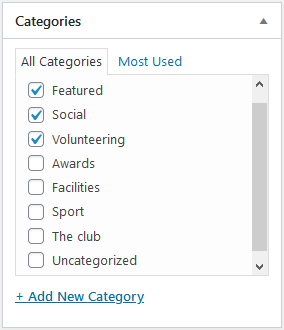
Categories can be created and selected from the 'Categories' section on the right hand side of the page editor or under 'Posts' -> 'Categories' in the admin menu. You should only assign one or two categories to each post.
To set a featured post (the post at the top of the featured blog posts template), the 'Featured' category must be set.
Tags
Tags are keywords that describe the post and its content. They appear at the bottom of the post under the 'Related topics' heading.
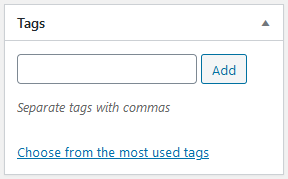
Tags can be created and selected from the 'Tags' section on the right hand side of the page editor or under 'Posts' -> 'Tags' in the admin menu. You should typically have no more than eight tags for each post.
-
Menus can be used on your site either as page navigation or just to sign-post specific links.
To access your sites menus, go to 'Appearance' then 'Menus' or 'Appearance' then 'Customise' on the left-hand side of your WordPress admin page.
For more information on using menus, see WordPress’s menu screen support.
There are four different menus you can work with in the theme:
Primary menu
This is the only menu that is turned on and in-use from the start. Disabling it is not recommended.

This menu is displayed at the top of your site and displays navigational links to top-level pages as well as sub-pages down one further level.
By default, all new top-level pages will be added to the primary menu. But you will have to add any sub-pages to the menu yourself.
Footer menus
If you are using the large footer, there are two different menus you can use in your footer, though they are entirely optional:
You can use these menus to display a variety of things, for example:
- some recent posts
- links to important pages
- specific post categories.
Audience menu
The audience menu displays links directly above the search bar. It is entirely optional.
This menu should only be used in special circumstances and should only display a small number of links.
-
A widget is a small piece of content that adds some extra functionality or content to your pages or posts.
To access the widget editor, go to 'Appearance' then 'Widgets' or 'Appearance' then 'Customise' on the left-hand side of your WordPress admin page.
For more information on using widgets, see WordPress’s widgets support page.
There are four different locations for you to insert widgets on your site:
- Page sidebar
(example page sidebar)
This will appear on the right-hand side on any page using the 'Default template' page template, and on any category or tag page.
Any page using the 'Full width page' template will not have a sidebar so no widgets will be displayed. - Post sidebar
(example post sidebar)
This will appear on the right-hand side of all of your posts. - Homepage sidebar
(example homepage sidebar)
This will appear alongside the 'More posts' section on pages using the 'Featured blog posts' page template. - All posts page sidebar
(example all posts page sidebar)
This will appear on the right-hand side of a page using the 'All posts' page template.
The theme has a variety of different widgets you can use on your site.
Here are some examples of some you can use:
Most read
This will display a list of your most viewed (clicked on) posts.
You can set how many posts are displayed and from what date they were viewed on. By default it will use the last 30 days of data.
Navbox
This allows you to create a DPL-styled 'navbox' on your site.
The link and label are required, whilst the image and text are optional. Any image uploaded should be 750 x 500 pixels in size.
Contact us
This lets you enter your own contact details (or use the standard University address) with an extra field for a phone number.
This will also automatically create a link to a contact page on your site, so make sure there is one set up with the URL of /contact/ or the link won't work.
Categories
This will display a list of all of the categories used within your blog’s posts.
Twitter profile
This will display a miniature Twitter feed on your site. Just enter the Twitter username and choose the limit of posts to display.
There are also a number of other customisation options to change how the feed displays.
- Page sidebar
